Authorizing a domain hosted on OVHcloud
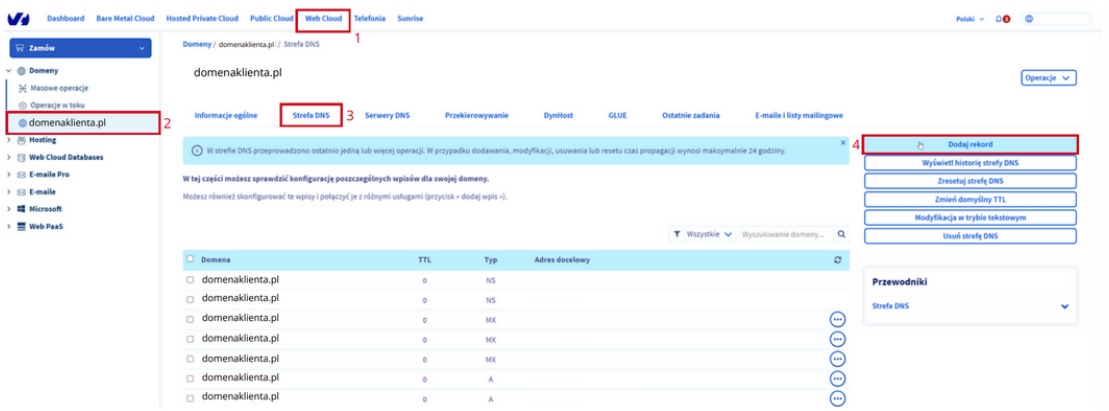
Log in to the customer panel in OVHcloud.
Then go to the "Web Cloud" tab.
Go to the "Domains" tab and select a domain.
Then select "DNS zone."
Select the "Add record" option.

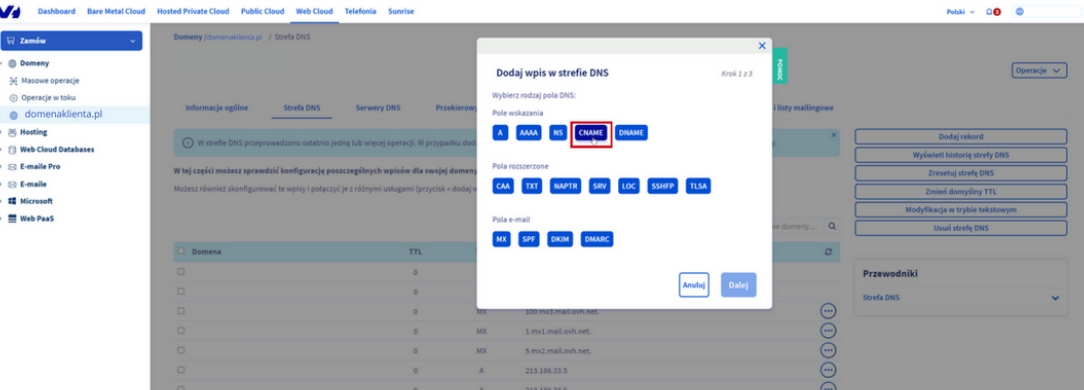
Next, select "CNAME" as the type of DNS field.

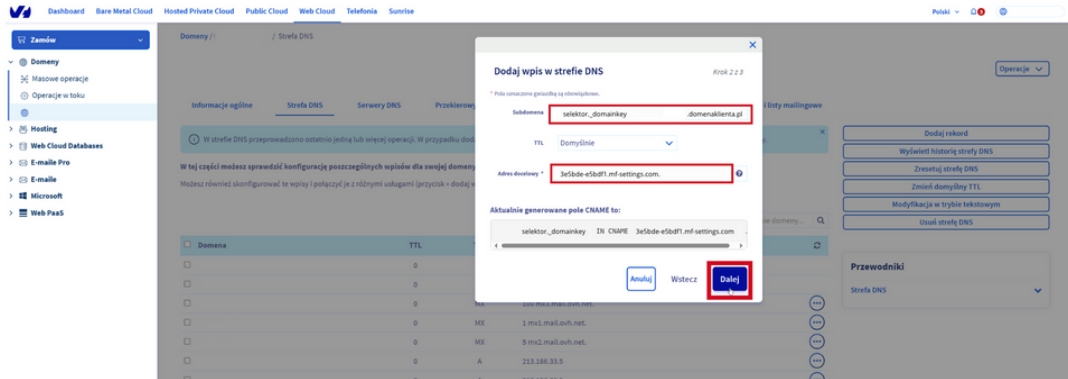
Then make the "Subdomain" field available by typing: selector._domainkey.yourjadomena.pl.
Complete the "Destination address" field with the value generated in the MessageFlow panel. [Be sure to put "." at the end of the value].
Click the "Next" button to proceed to the next step.

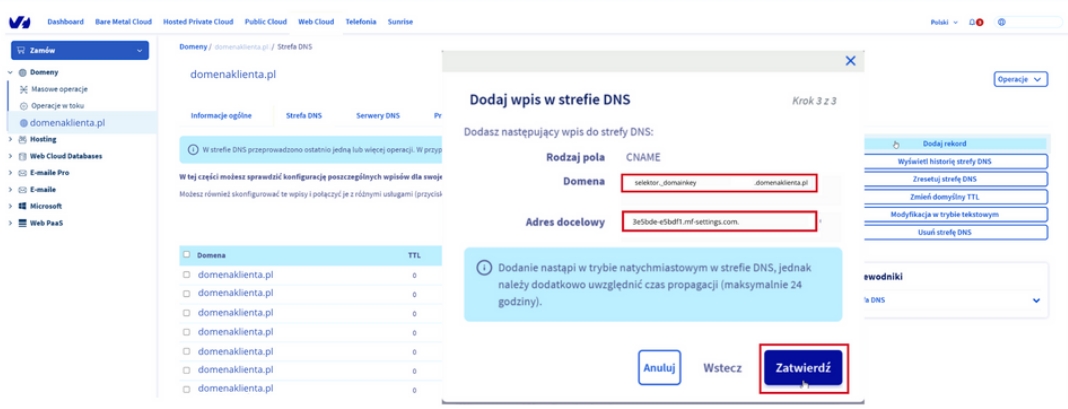
Then click the "Approve" button to save your changes.

Waiting for the DNS system to approve changes can take several minutes or hours. It all depends on the propagation of DNS records.
Last updated